Toilet Exit Light
24 Mar 2017House warming party coming and needed something to impress my fellow guild members. Toilet is going to be used a lot, so what better place to place some useless but preposterous product. So step aside school work! We got some work to do!
Introduction
Okay. I have always wondered what kind of extra lighting the toilet could need. Our house works with a central “home-out”-switch that cuts out most of the wall sockets and lights. That is handy for a forgetful person as the oven can’t be left on, but it has a downside. Our toilet light works with a motion detector, so it cannot be turned off. And because of the cat that wonders around the house during the night, we cannot leave the main switch on at nights as the toilet light shines right at our bedroom if cat happens to go there.
So we need something battery powered light for the bathroom to be used at night as a night light, but it could be something that satisfies my tweaker-tuner-adjuster-hacker-tinkerer mind. And I happened to have just the right parts…
Parts needed
Here is a list of needed parts:
- Emergency exit light
- Looted from the high school electronics recycling
- Marked to work with 7 volts, we are going to use a little over 8 for the brightness sake
- 18650 batteries x 2
- These can be found from old laptop battery cells when disassembled
- Gives 4.12 volt each
- Battery holder
- Holds 2 x 18650 batteries, ordered from DealExtreme
- Switch
- Disassembled from looted electronics
- Touch switch/sensor
- Also looted, probably from an old CD-player where it worked as a lid sensor
- Potentiometer
- Looted. Yes, our electronics recycling is pretty good source of parts!
- Transformer housing
- Looted with the exit light
- Wire
Tools and materials for working: - Multimeter
- (DC Power source)
- Soldering iron and solder
- Duck tape and two sided tape
- Screws and drill
The research
First I needed to figure out the maximum voltage the exit sign can take by using an adjustable power source. I get the LEDs turn on at 3 volts but very dim. More power it is then. At 8 volts they start to get pretty bright, but careful power adding promises more brightness. At 12 volts the LEDs turn to blueish so I think this might be the limit. Also smoking of the resistor indicates the same, so I take another exit light and decide to use safe 8 volts. Also this exit light unit has a marking of 7 volts which would have been very useful to know before burning a component from another light. Mental note, inspect the parts thoroughly before plugging in the power! Also, after smoke has cleared, read the manual.
Next we disassemble some needed parts for the light control. With a multimeter we can test the functionality of a potentiometer. The values for potentiometer resistance are from 0 to 8kΩ. This makes the light to turn almost off at 10% tuning, so a feasible dimmer functionality happens at 1-5% potentiometer turning. Not practical, but will do for now.
I did some digging to spare parts I have been gathered from looting the electronics recycling of our high school department. One simple switch, and one super small press switch. That is probably from an old CD player to stop the CD from spinning when the lid is up. Excellent for the advanced functionality of this gadget.
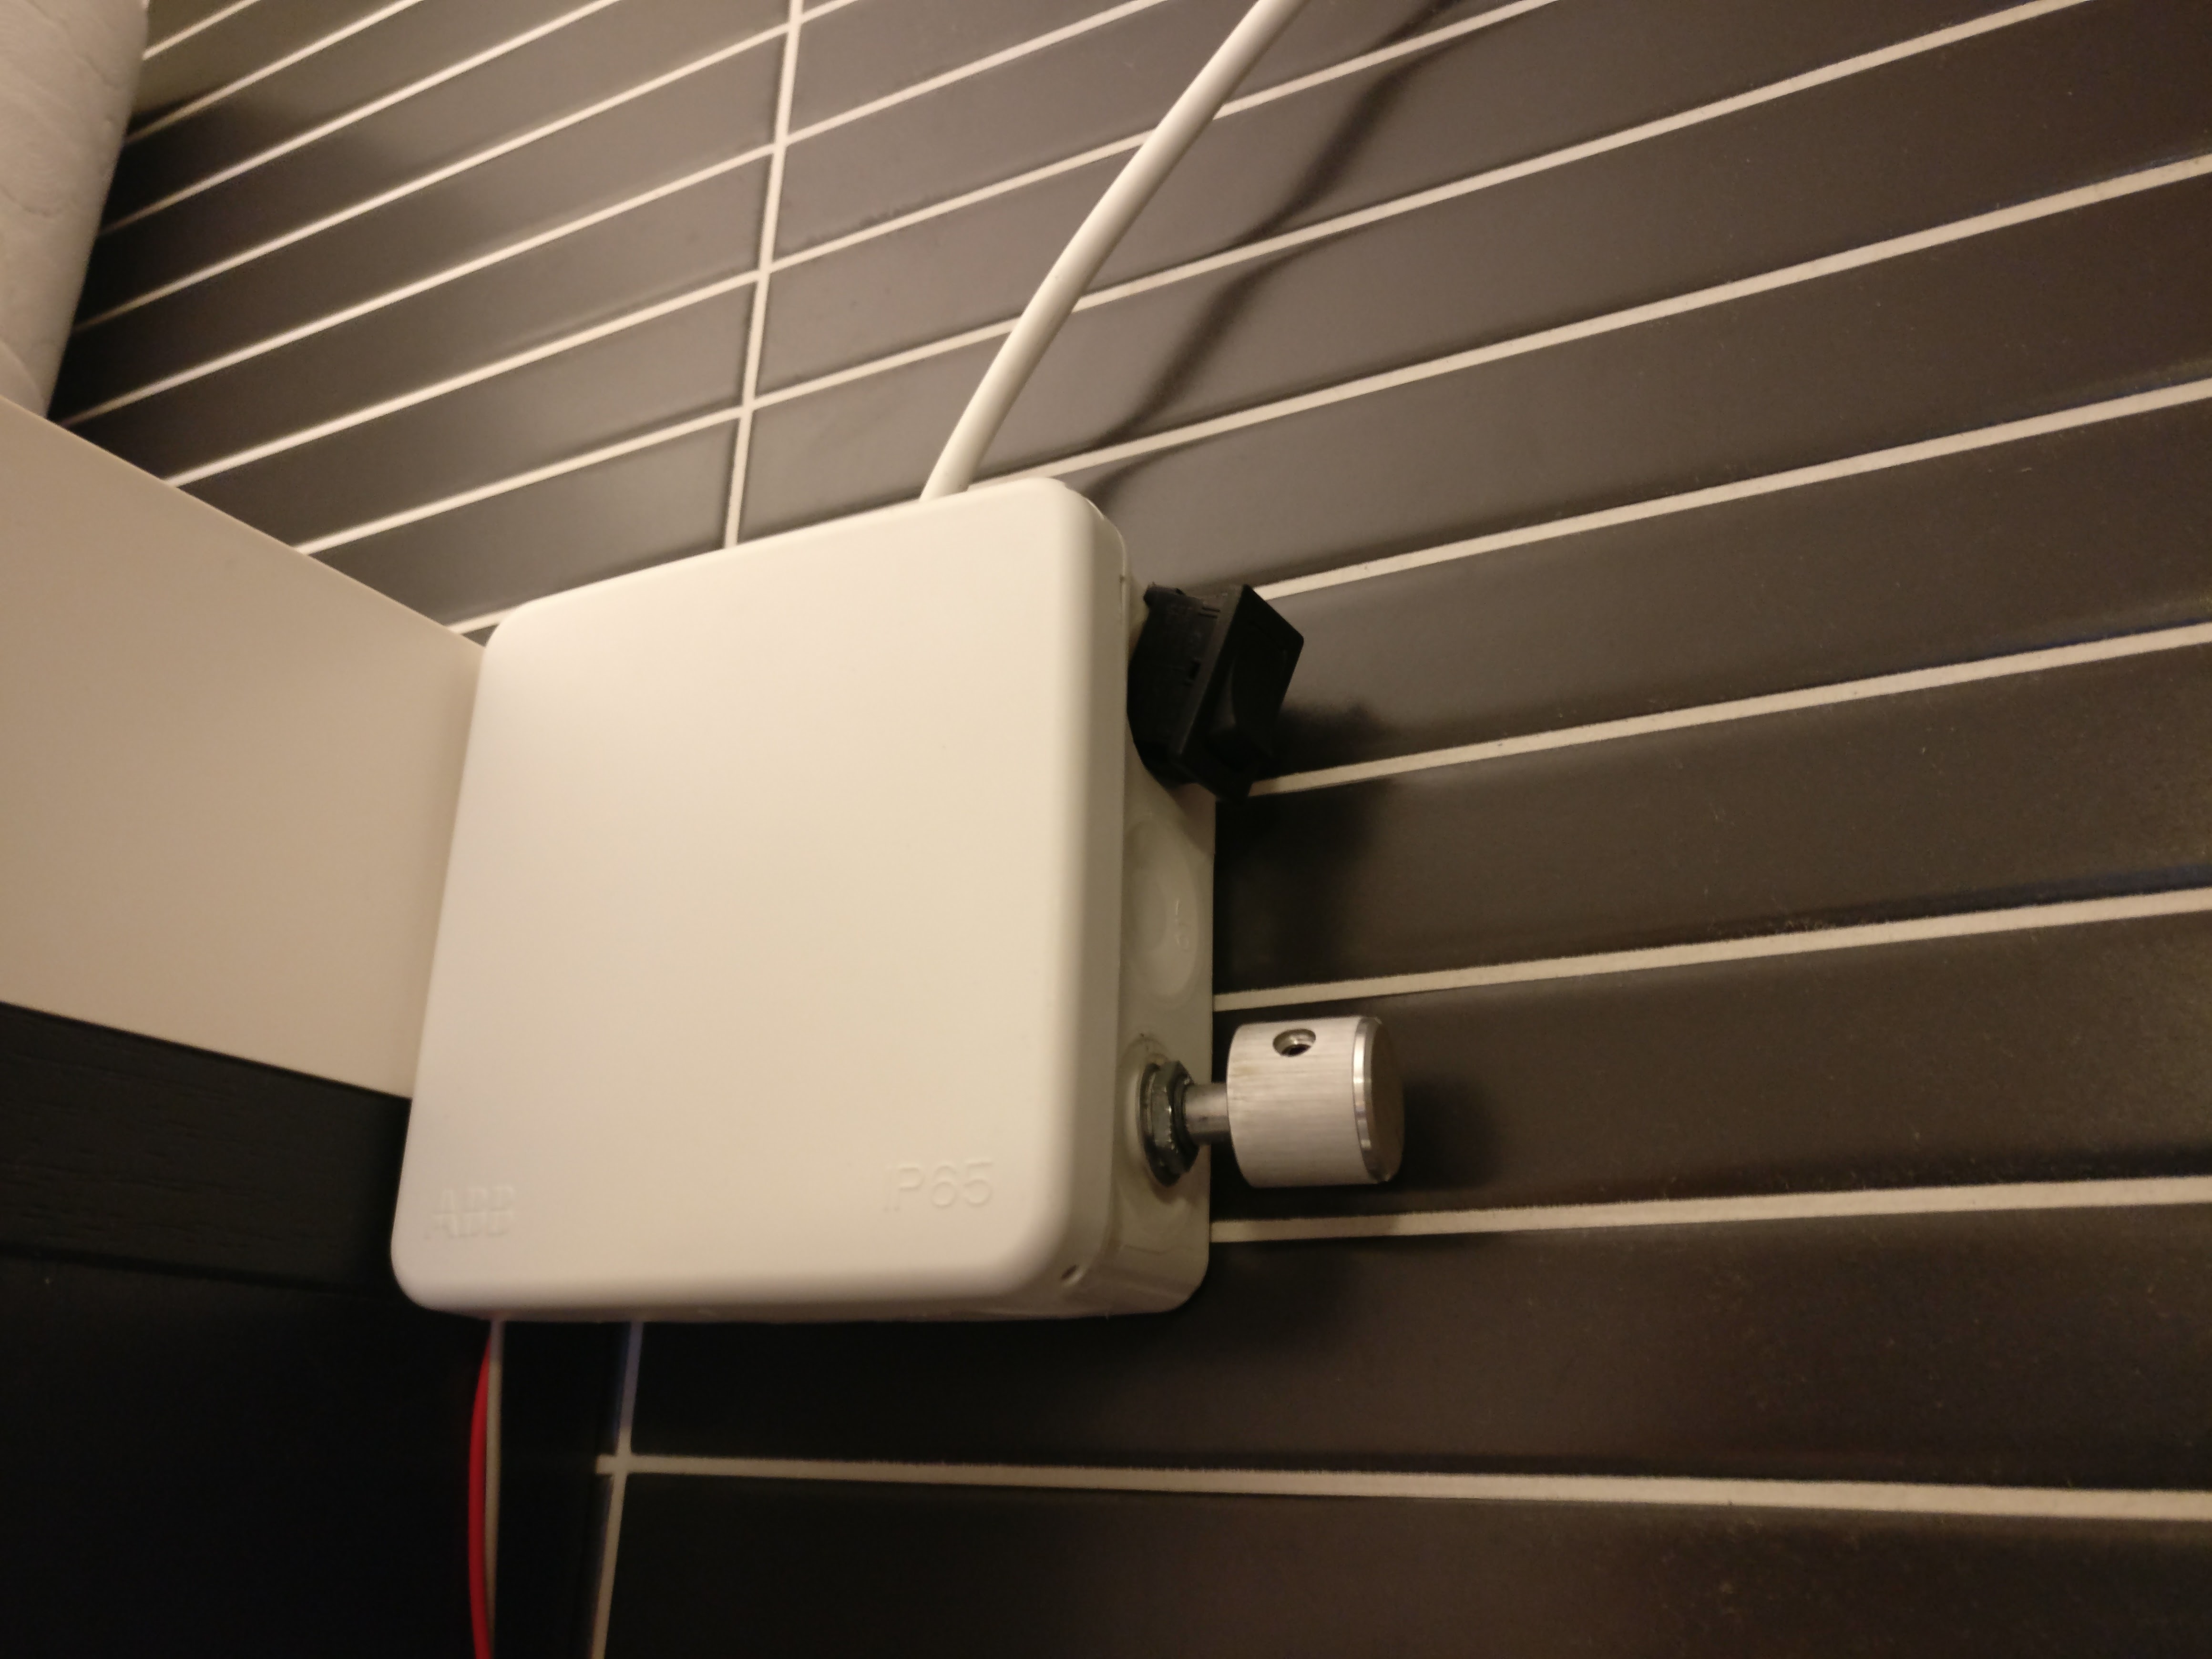 Final touch comes from the transformer housing used with these kind of emergency lightings. It is also wide enough for the battery holder to stick in without any attaching material. Neat!
The work
I used an online schematics drawing tool to make the technical drawing of the project.
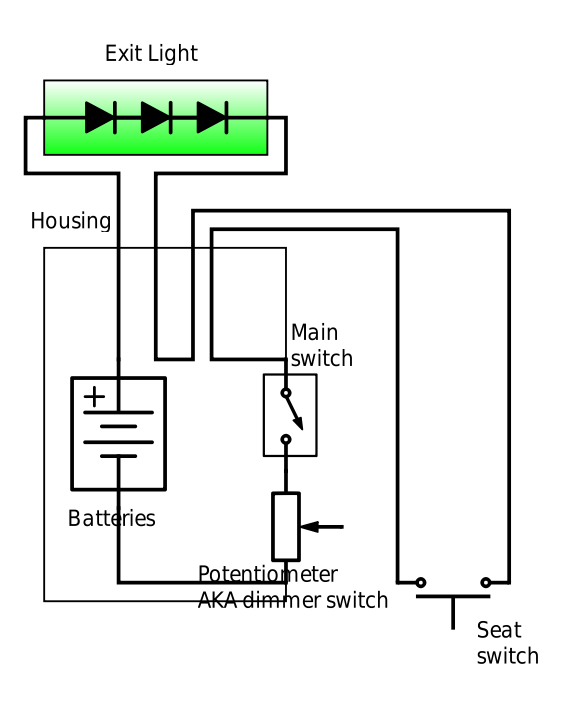
Feel free to suggest some more convenient drawing tools!
So let’s get soldering! From batteries to the potentiometer to adjust the brightness. From there to main switch to turn the light off. To the other end of the switch we attach the press switch with a meter long cable. From there to the exit light wire, and the other end of the light back to the batteries. And voilà!
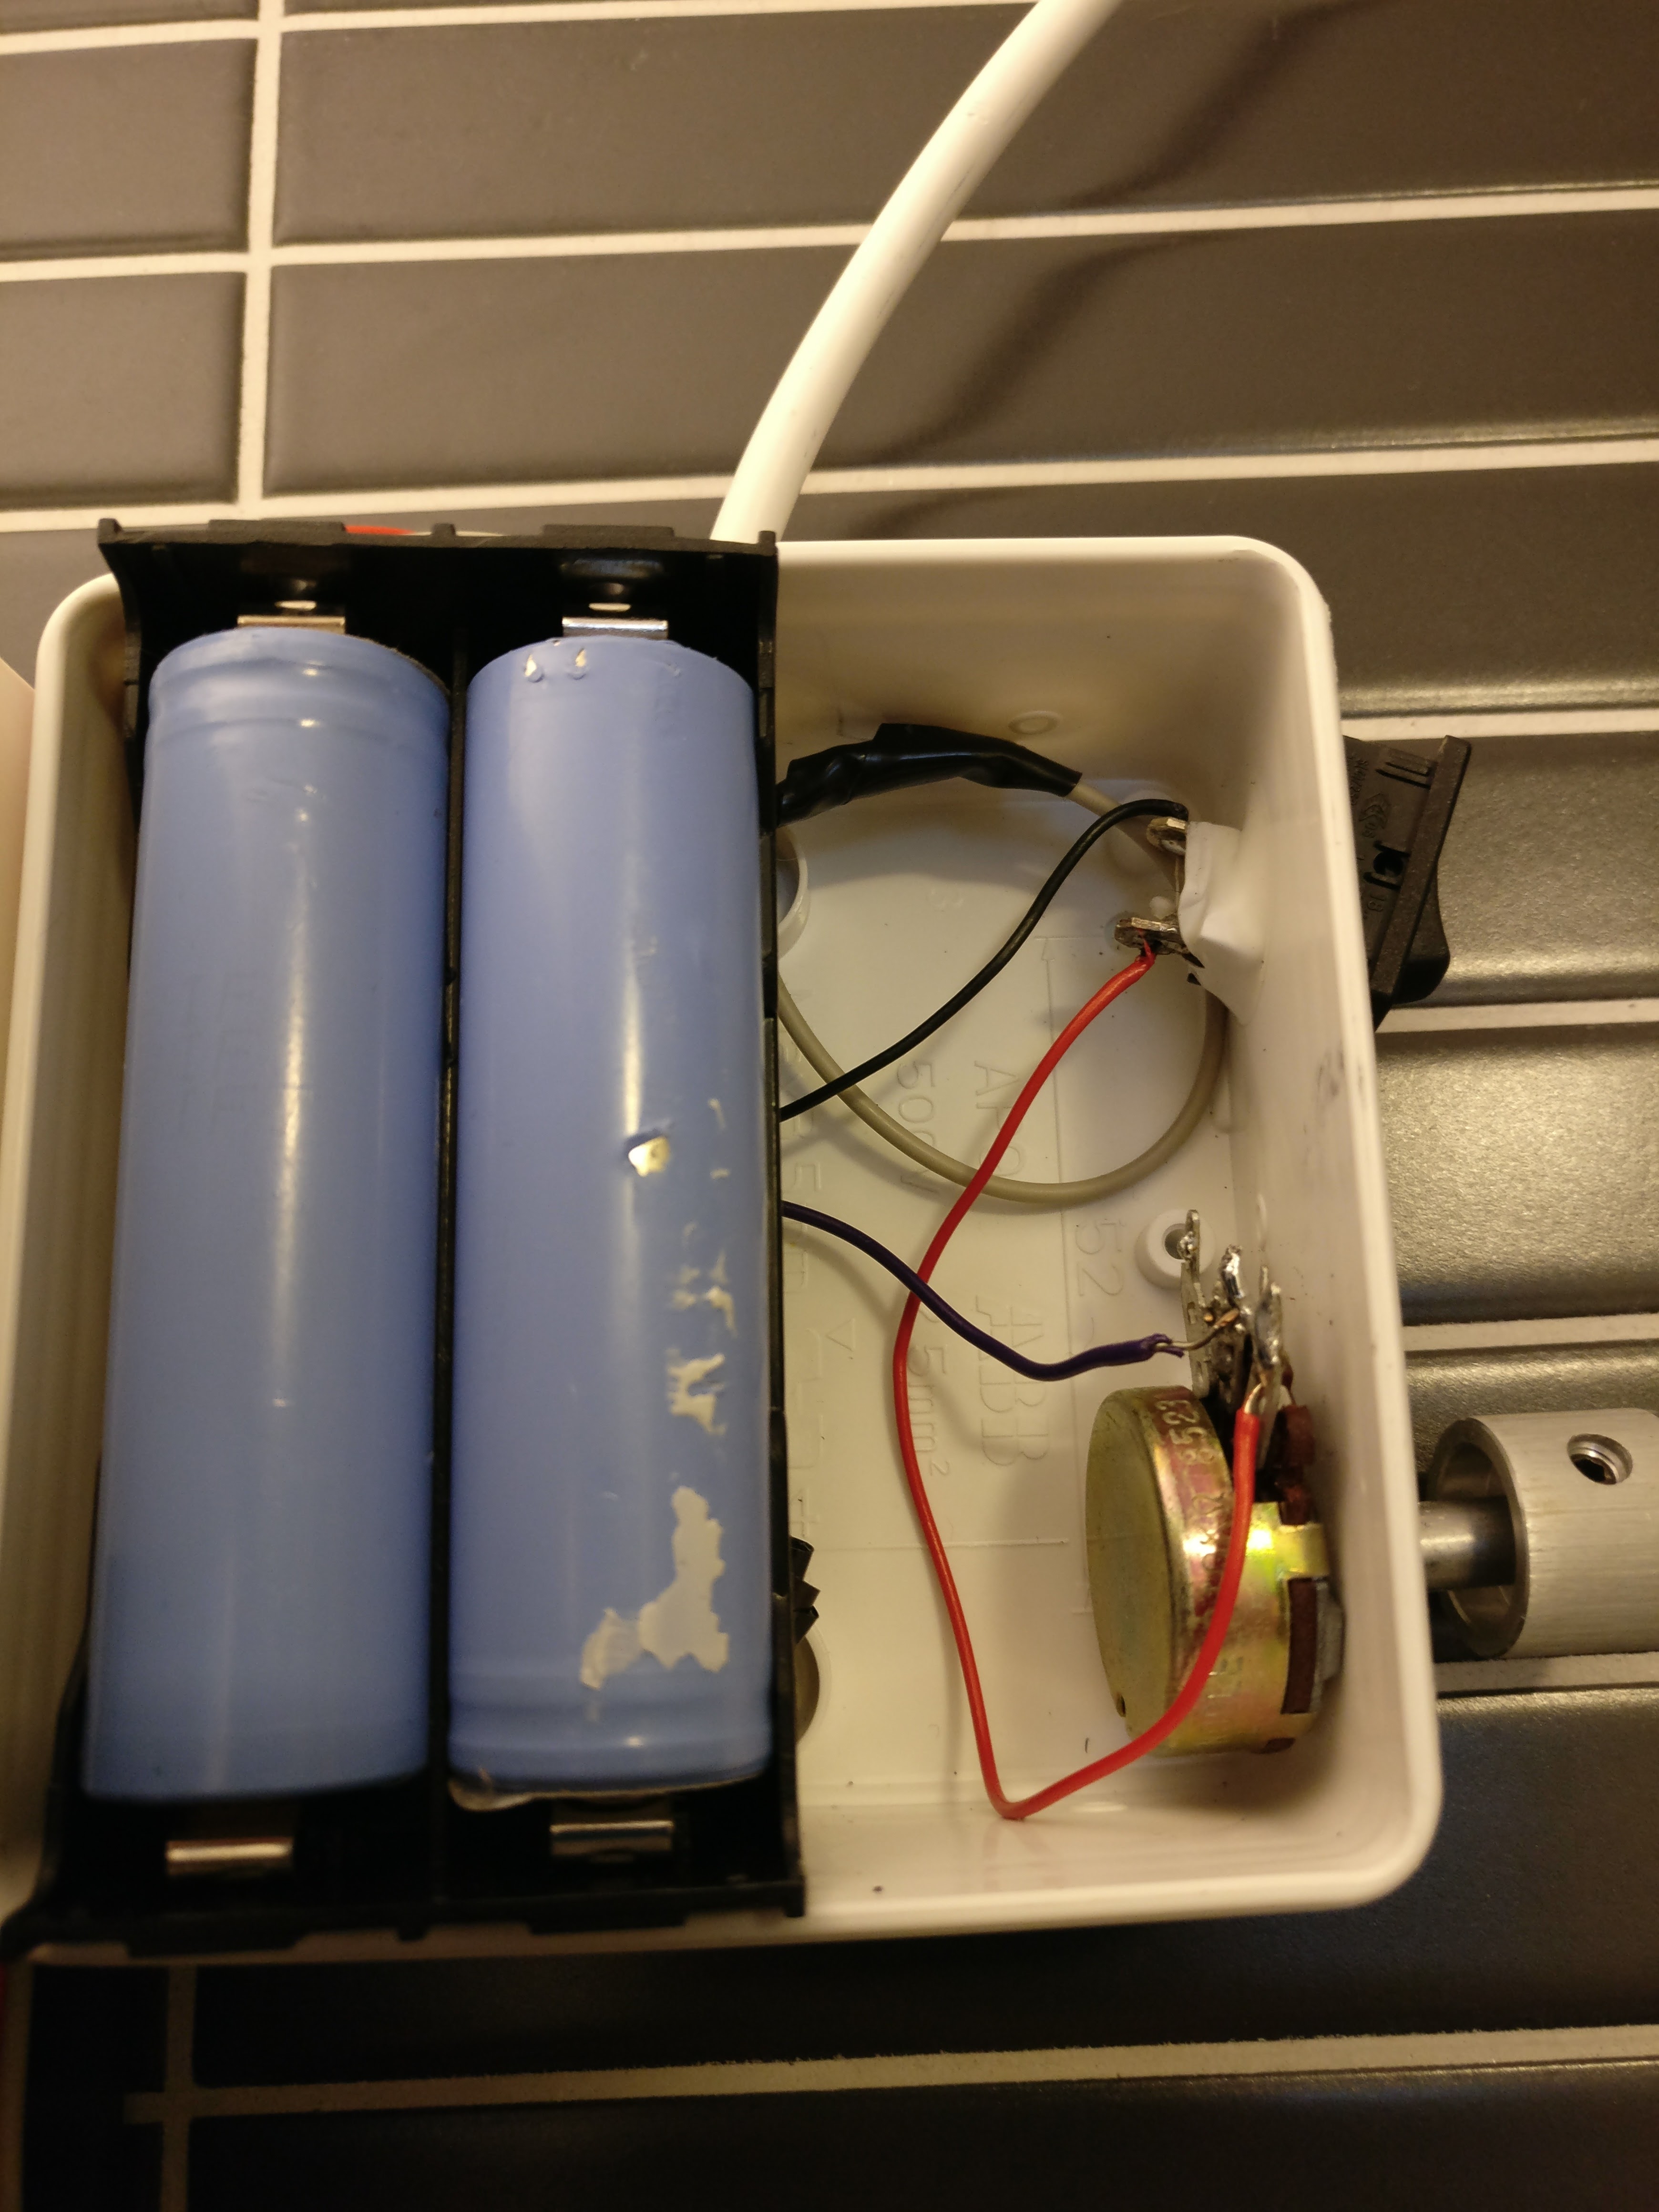 Inners with batteries showing.
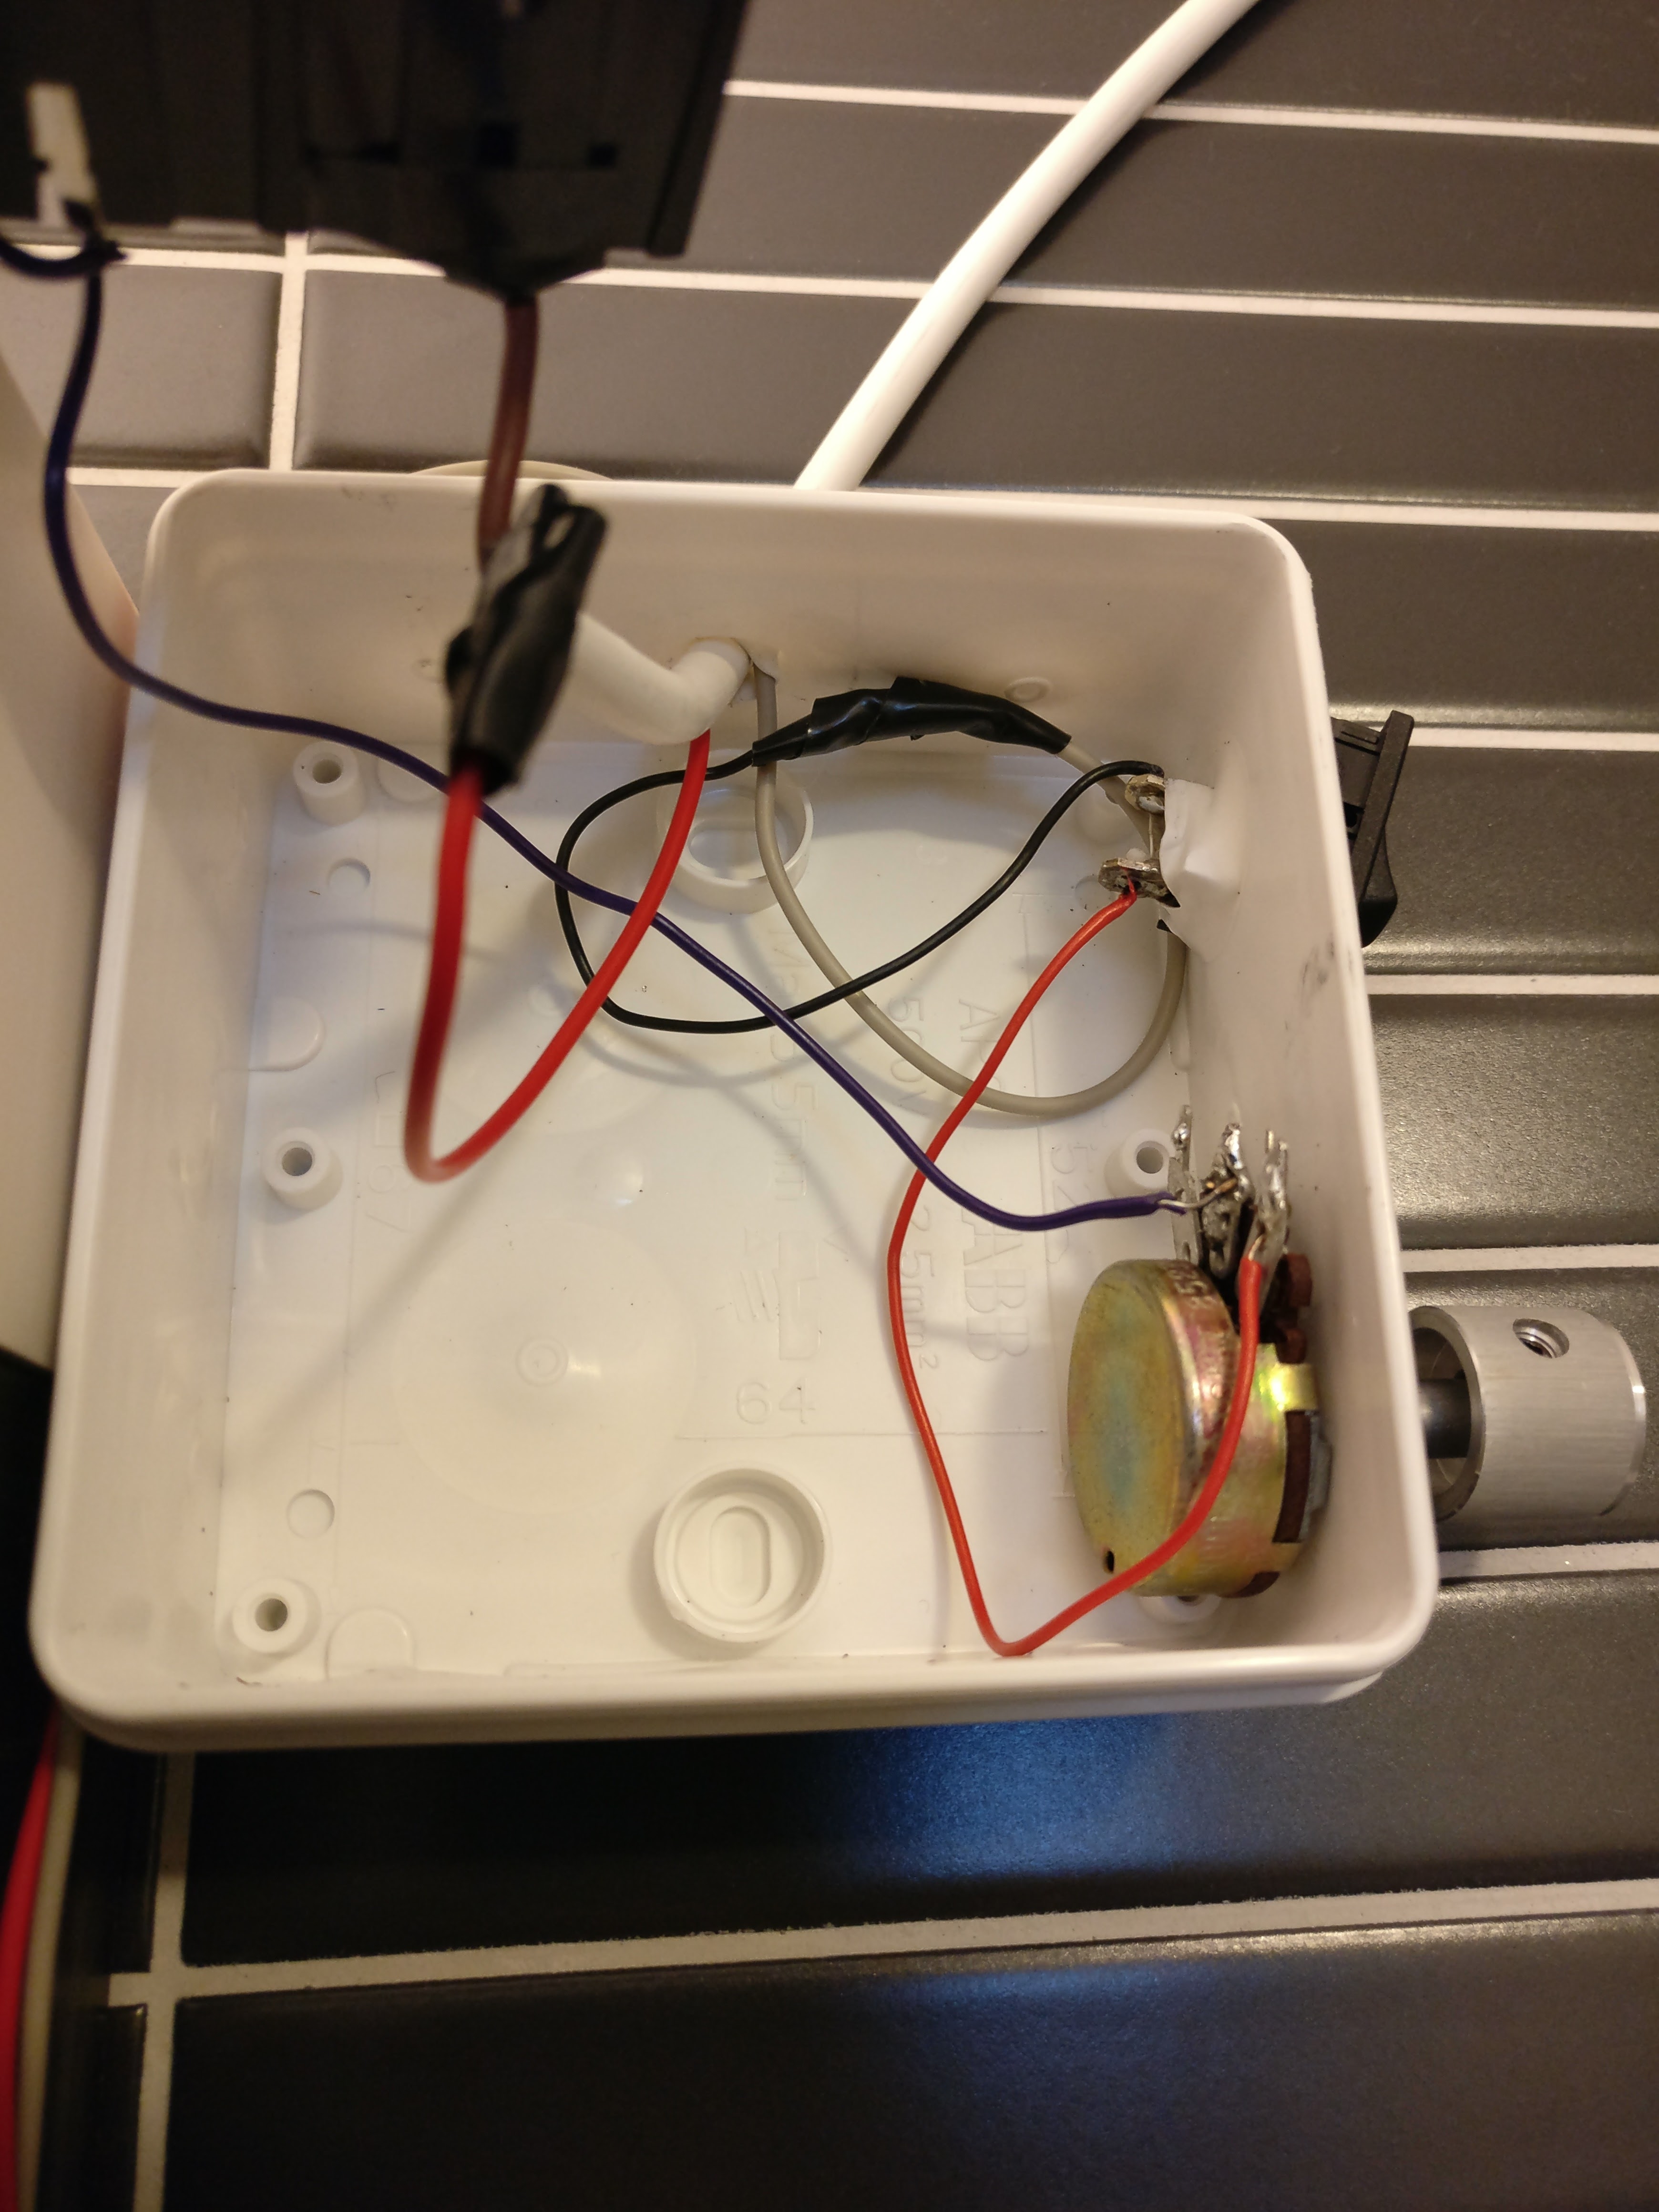 Inners without batteries. The wire to battery holder is long enough that the holder can be removed for easy battery replacement.
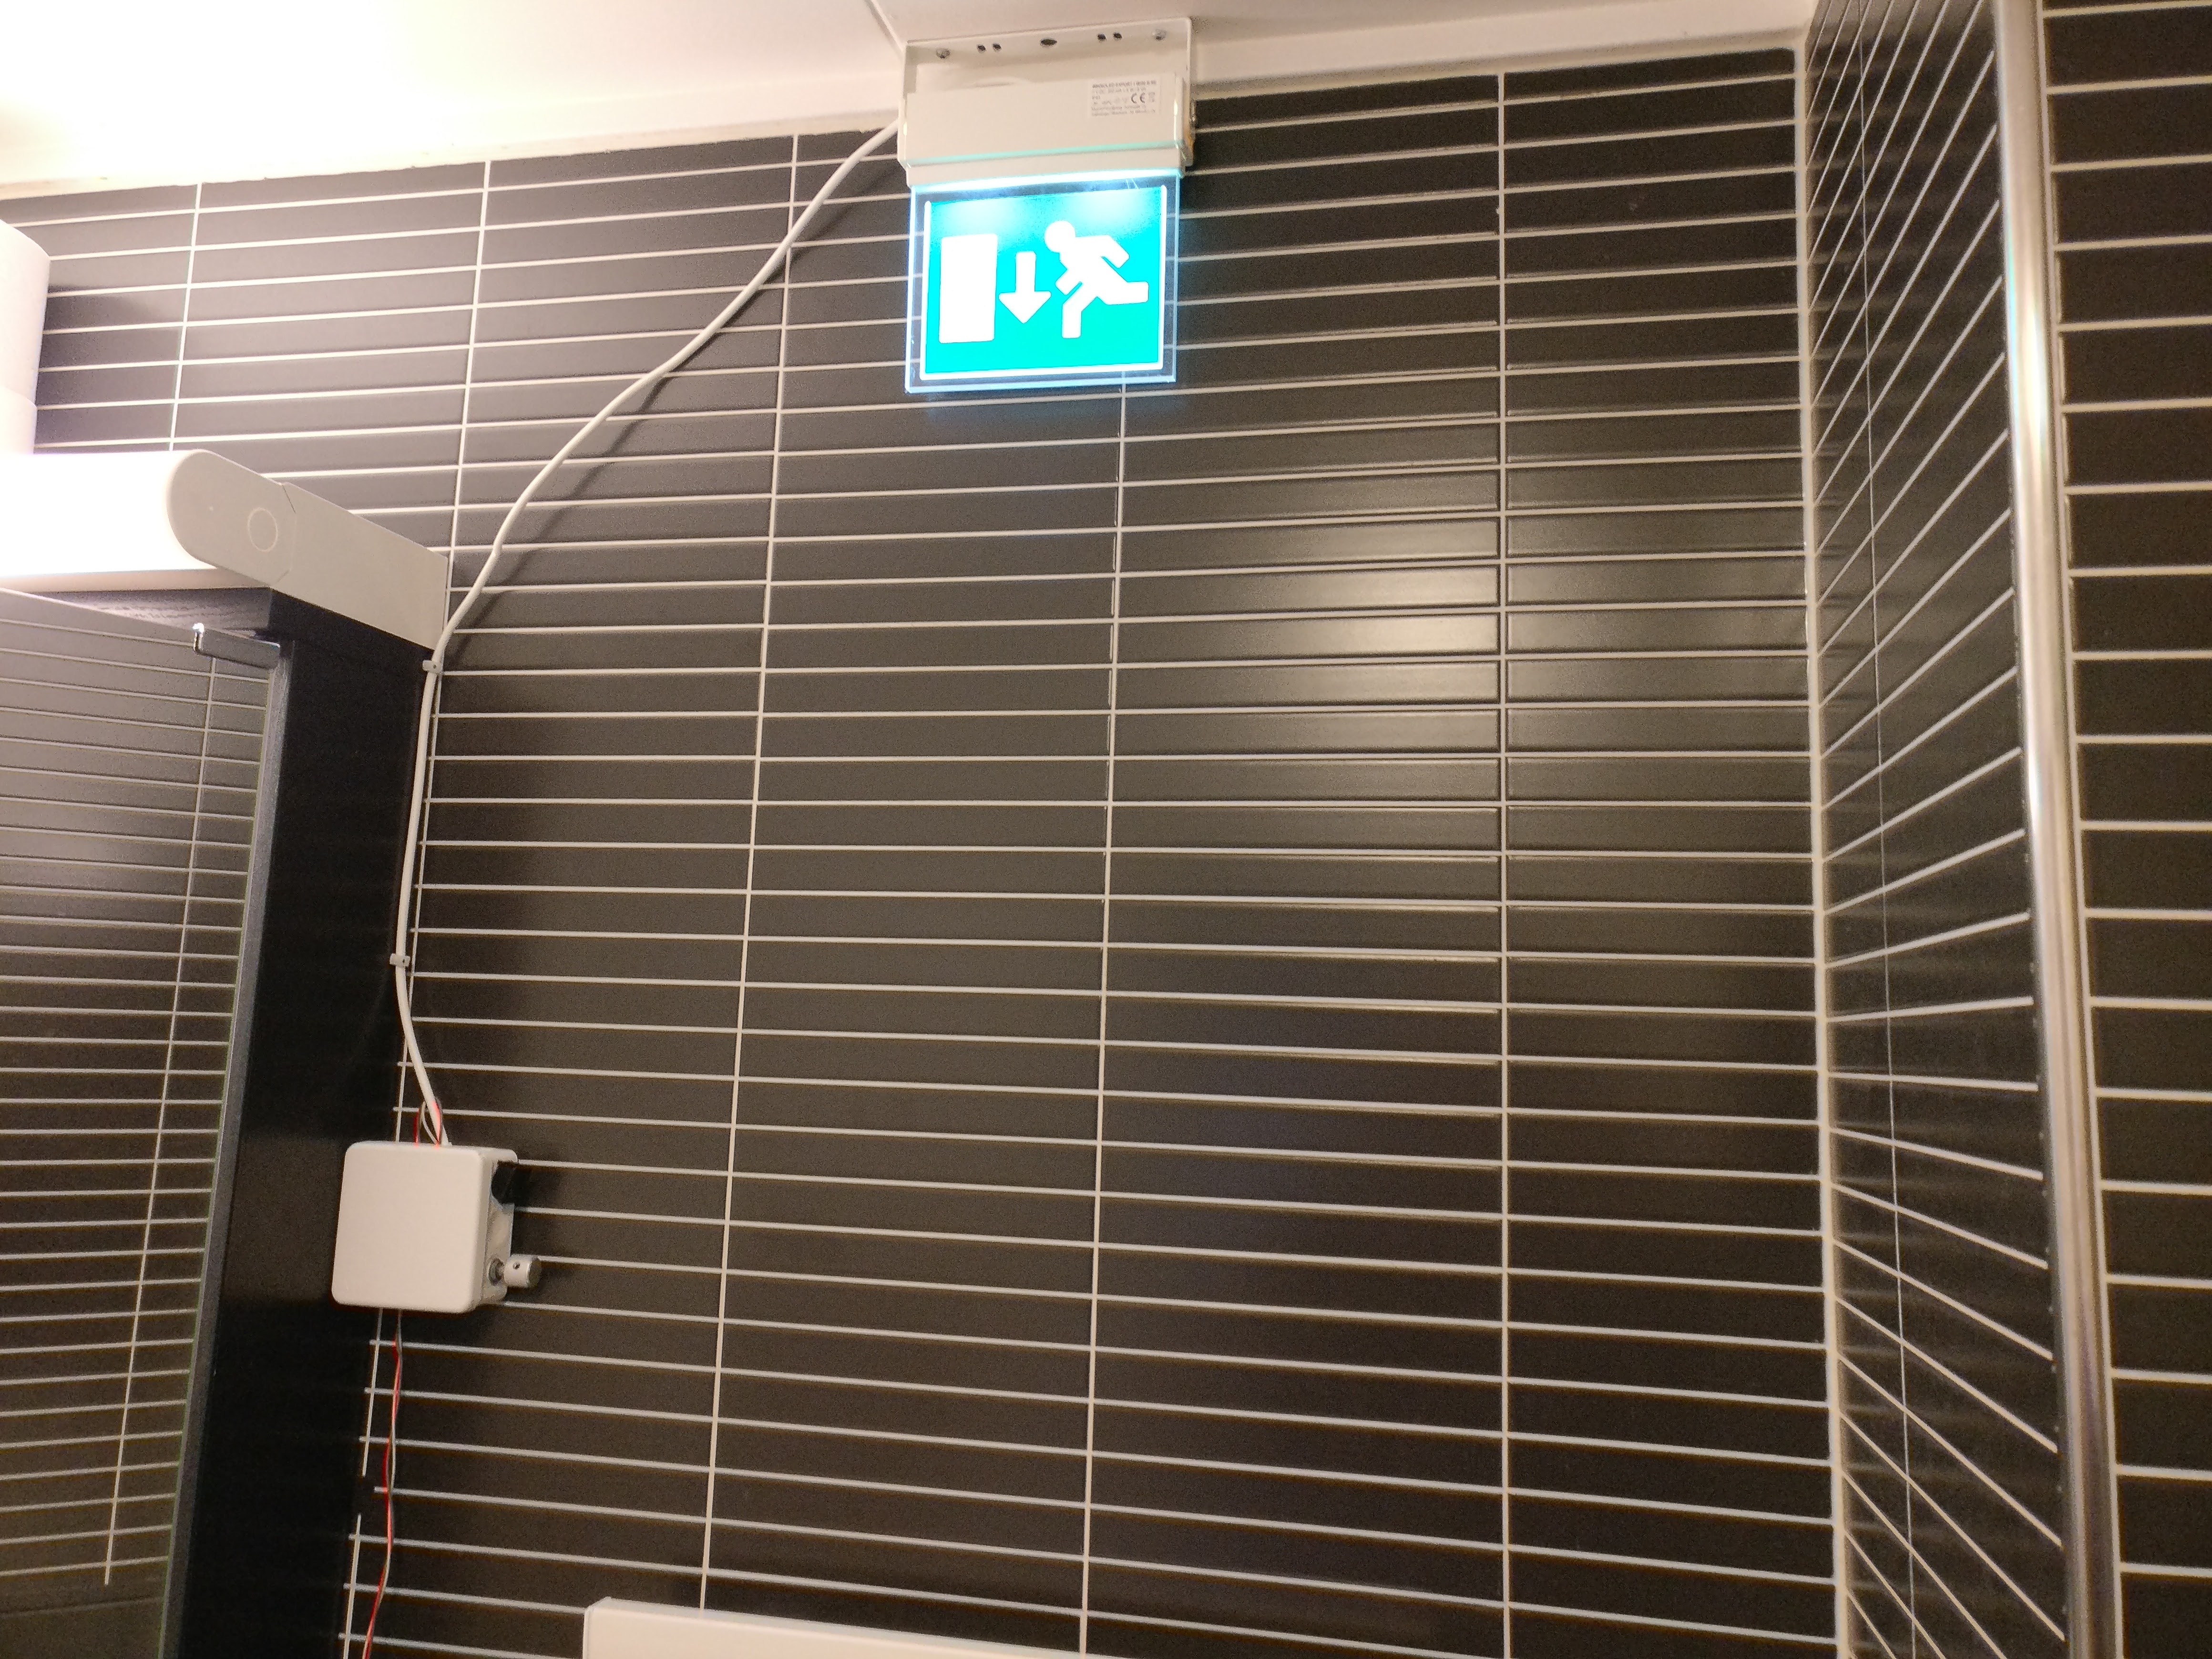
Now all we need is the installation!
First attempt was with two sided tape. However, the transformer housing is made out of some repellant plastic and it just doesn’t hold on the wall. The two sided tape seems to be also very poor quality as in two days the light came down from the ceiling.
I admit, I usually does this with electronics and installation of things, I don’t want to make permanent solutions as I don’t trust that they are good enough to be permanent solutions.
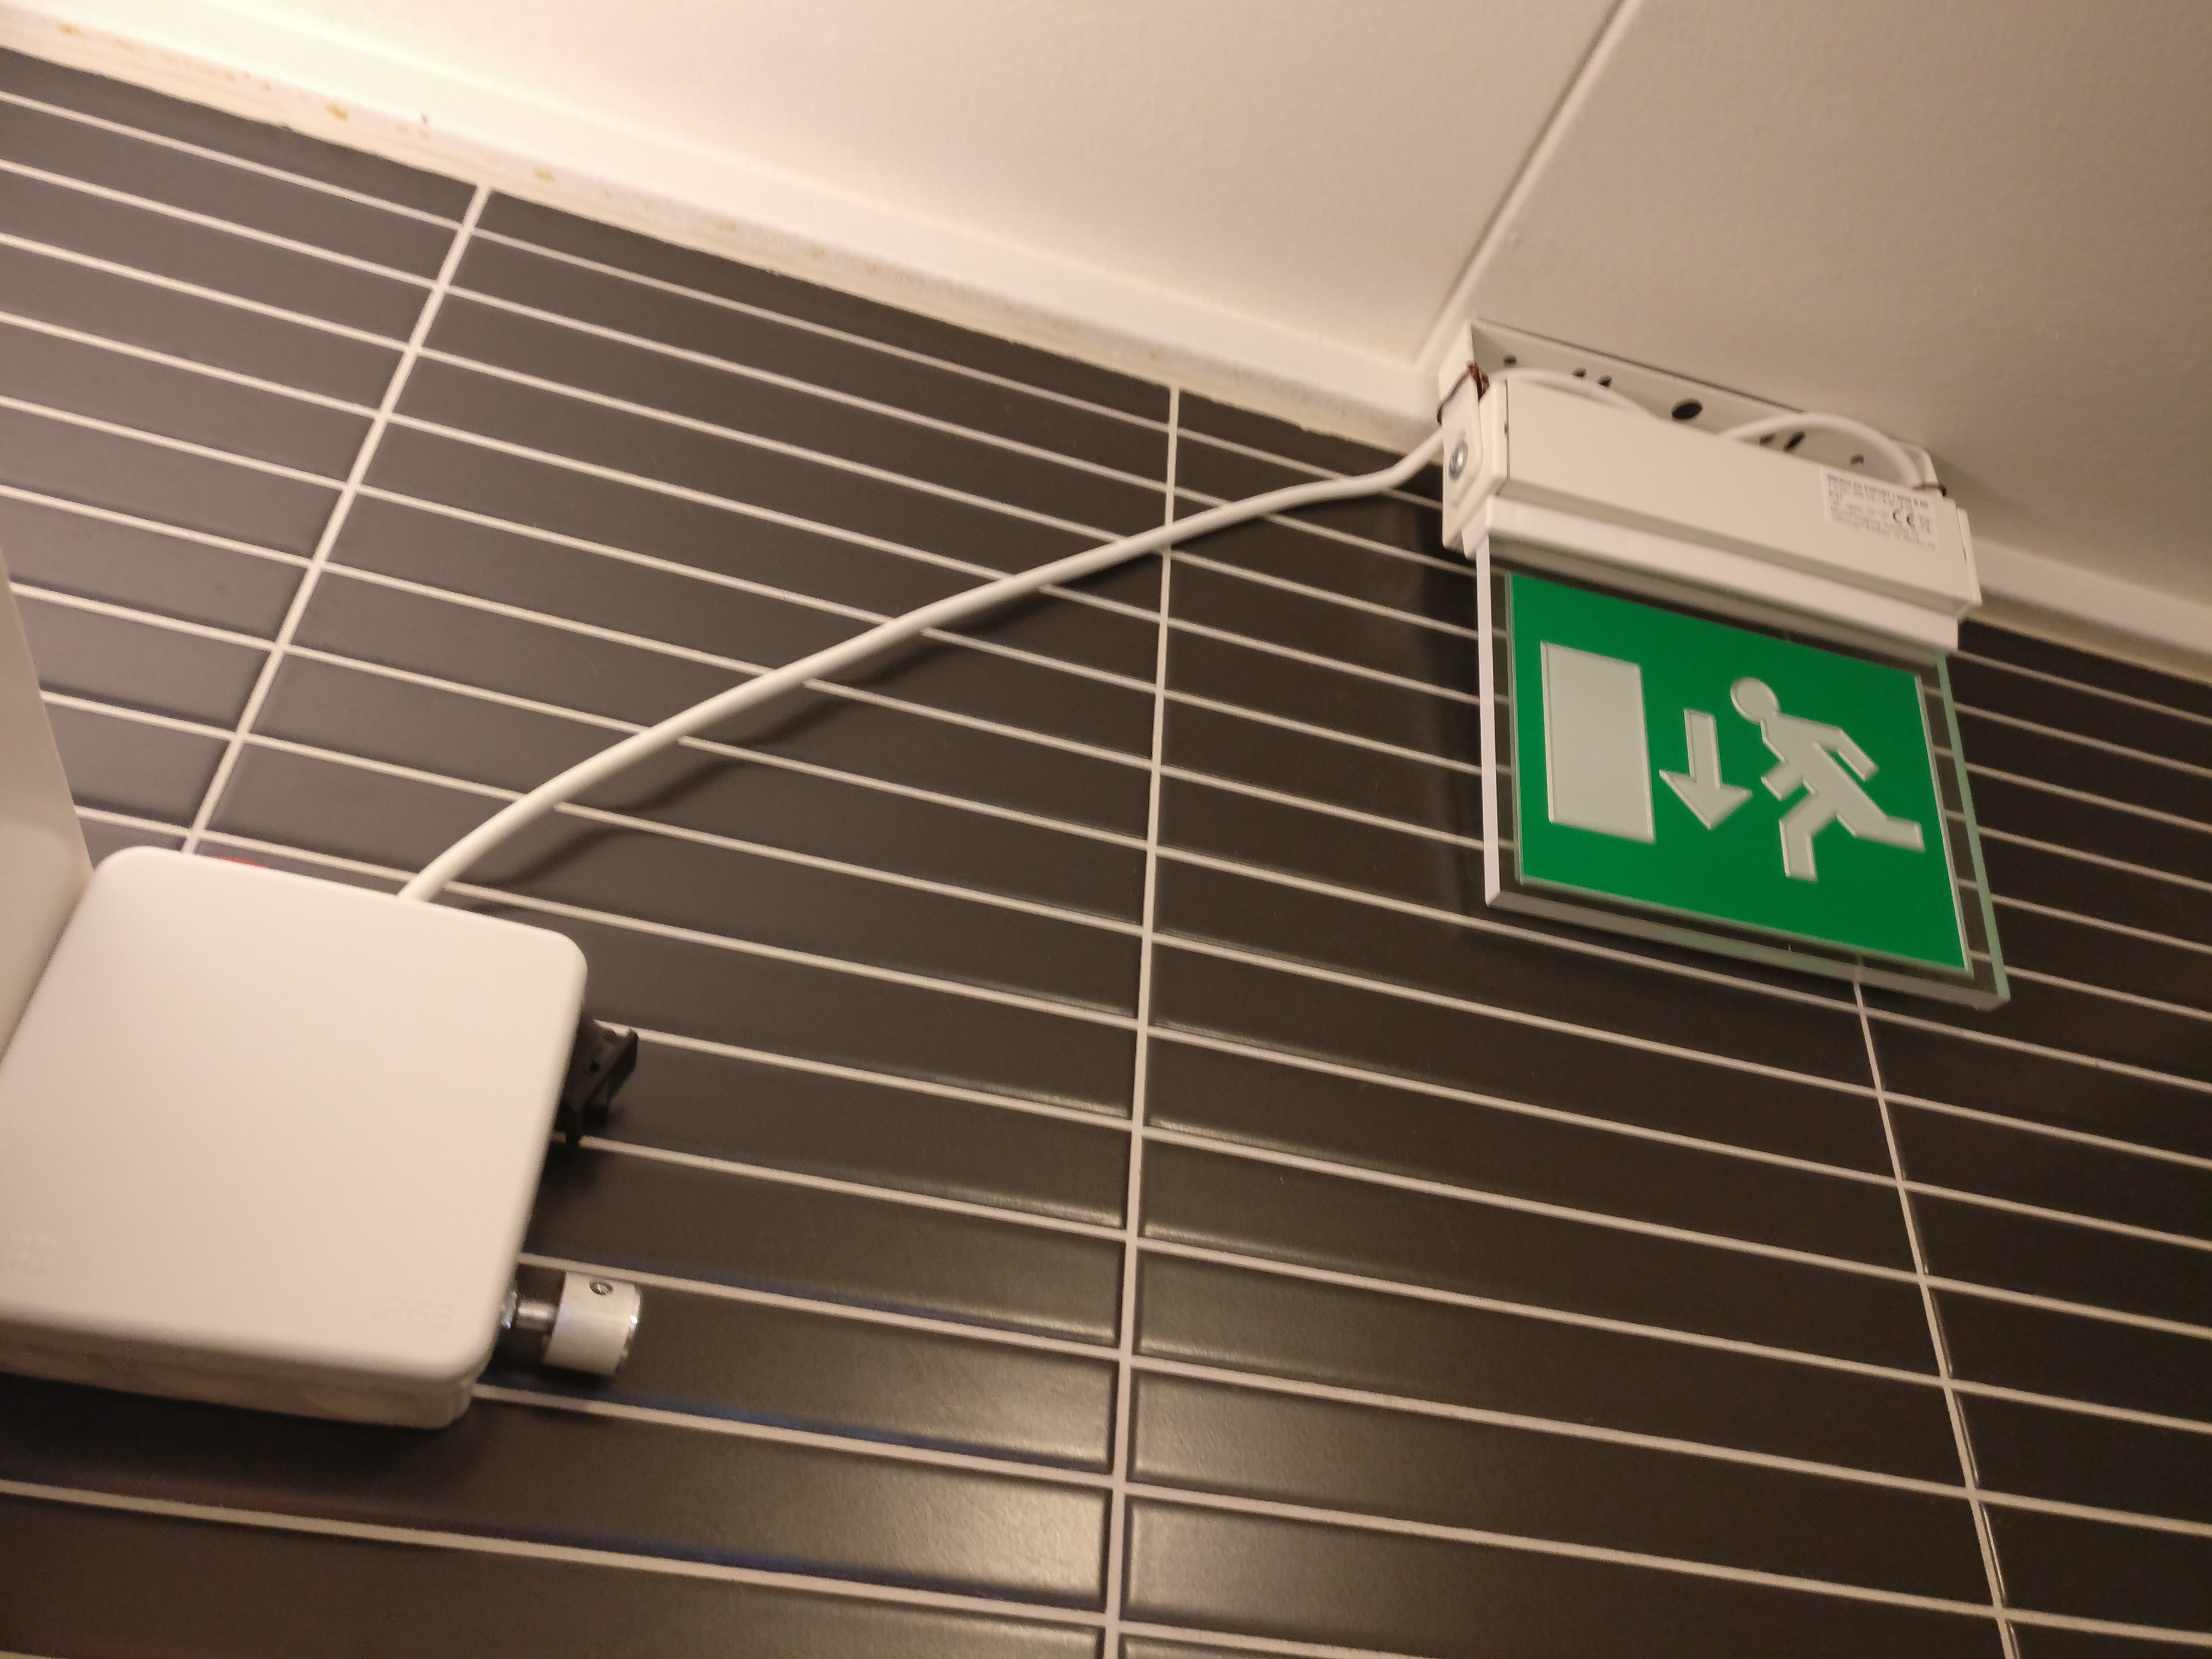
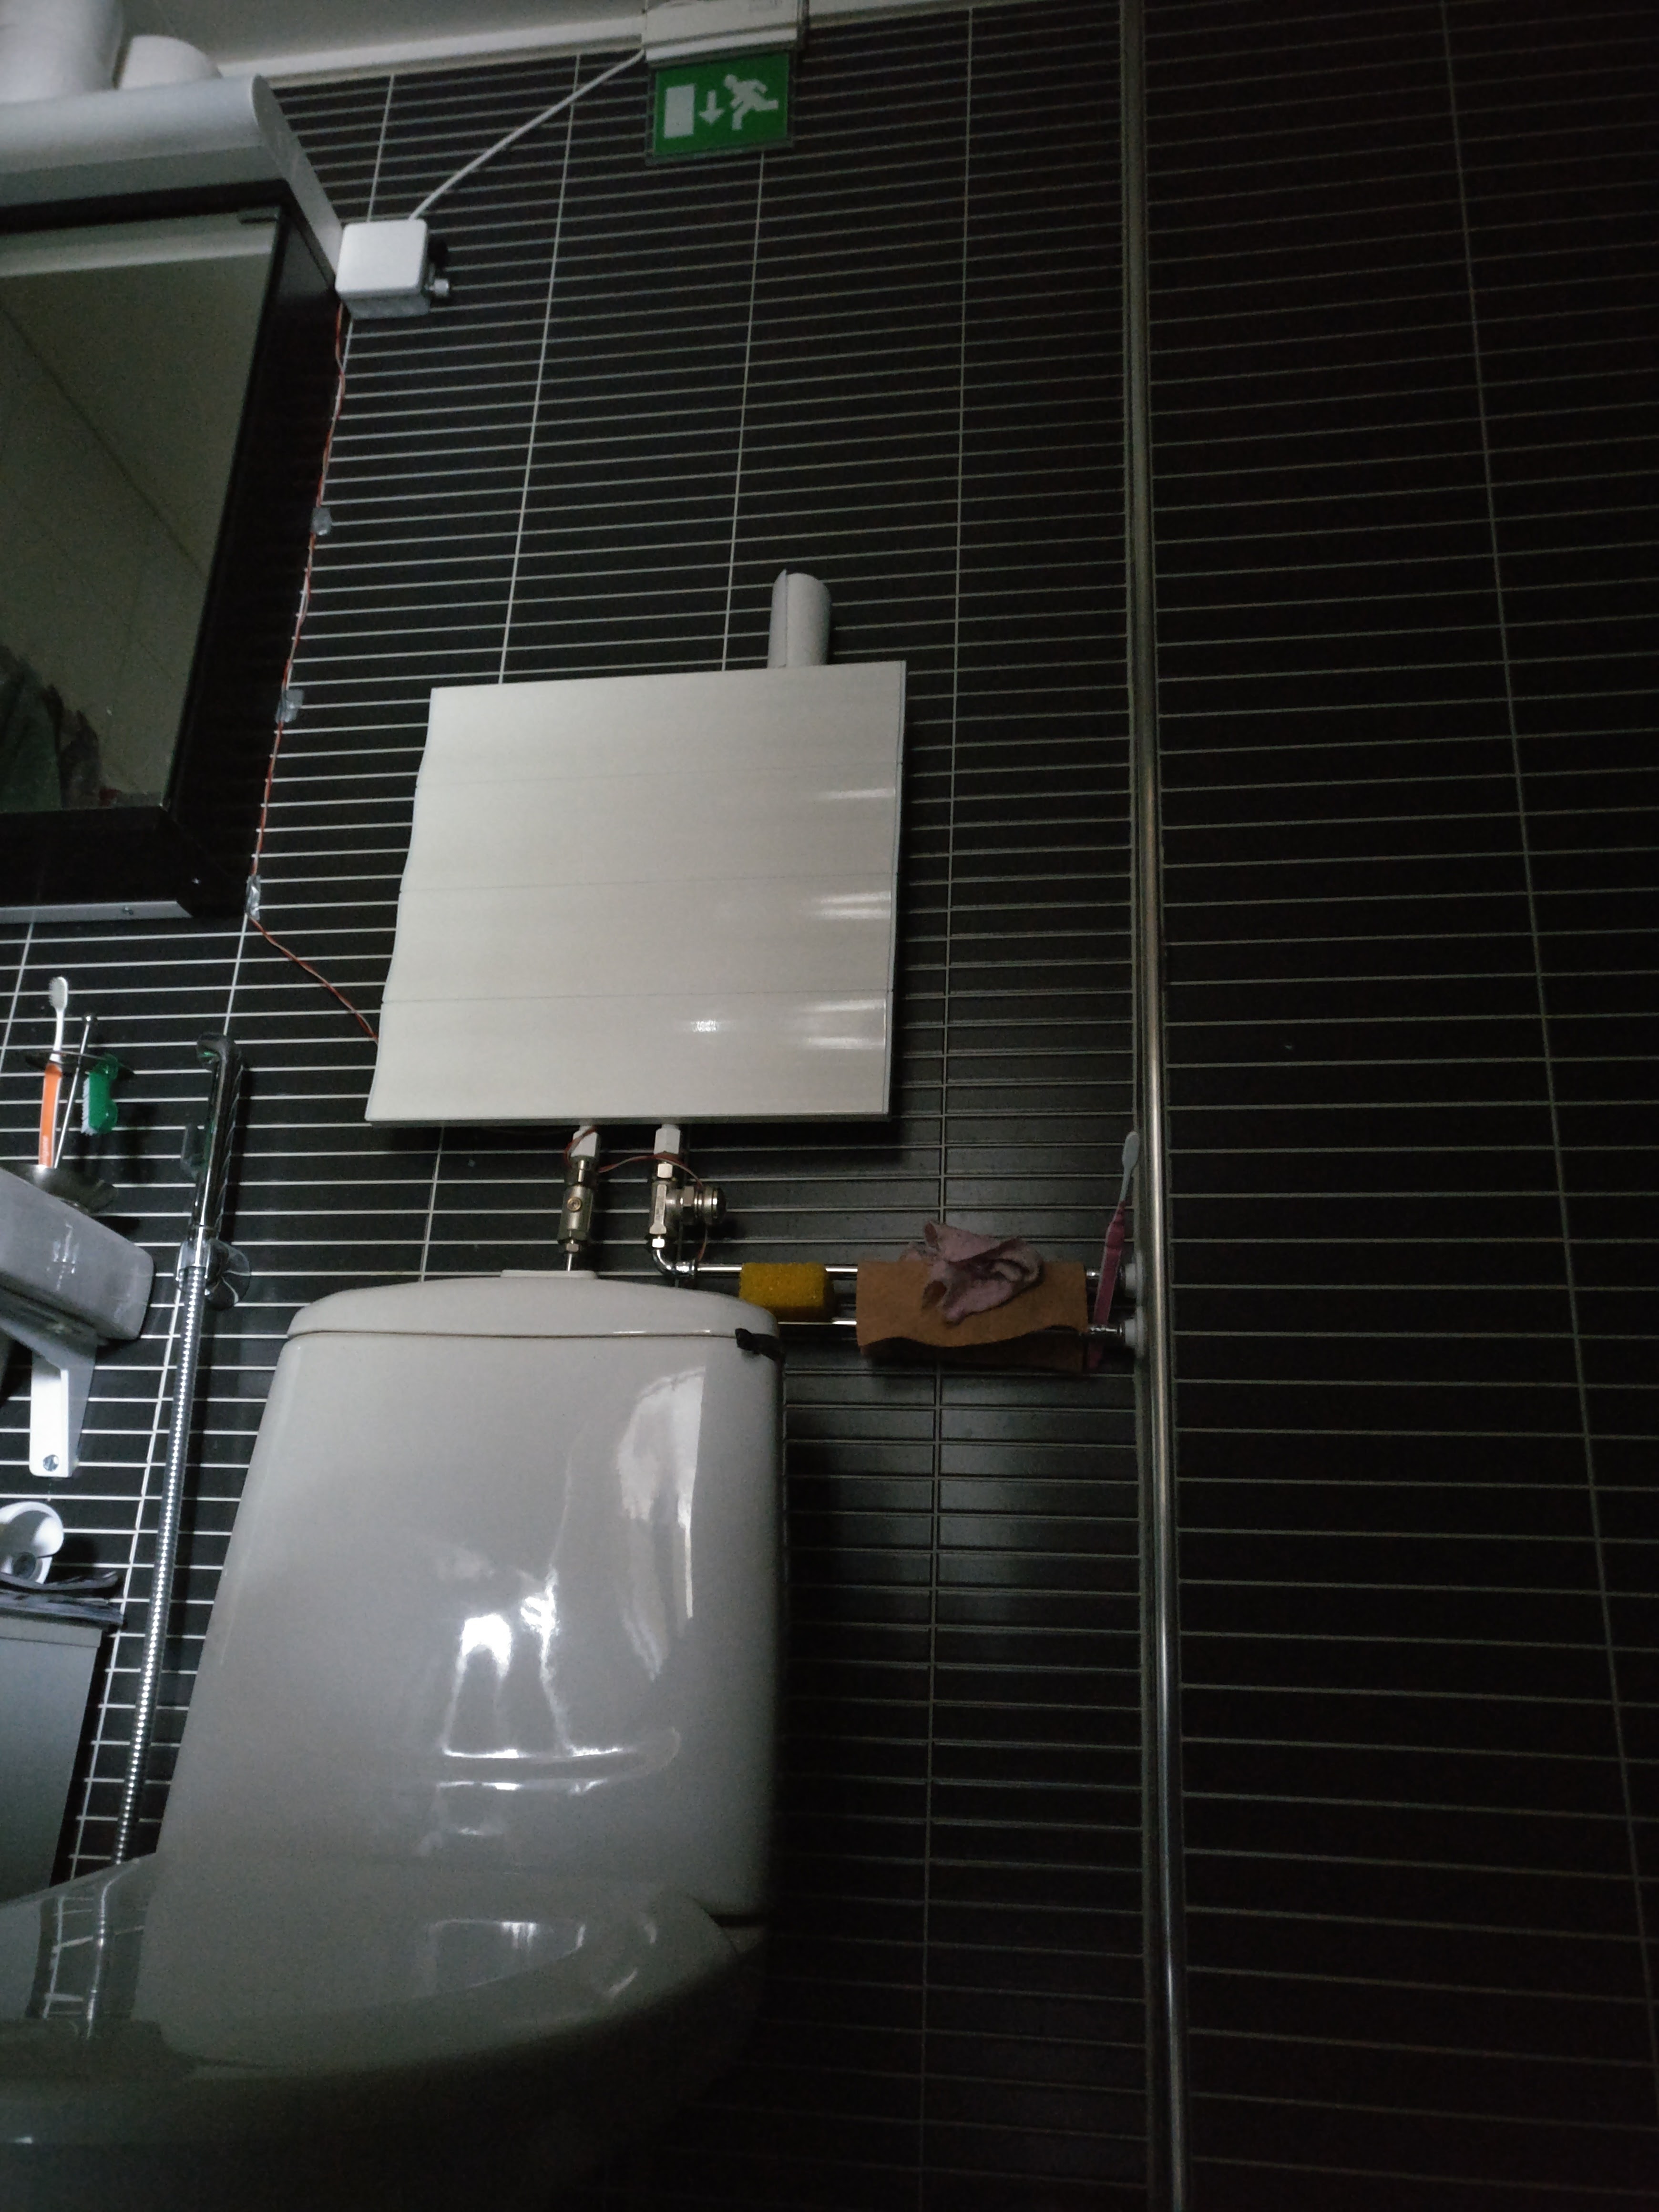
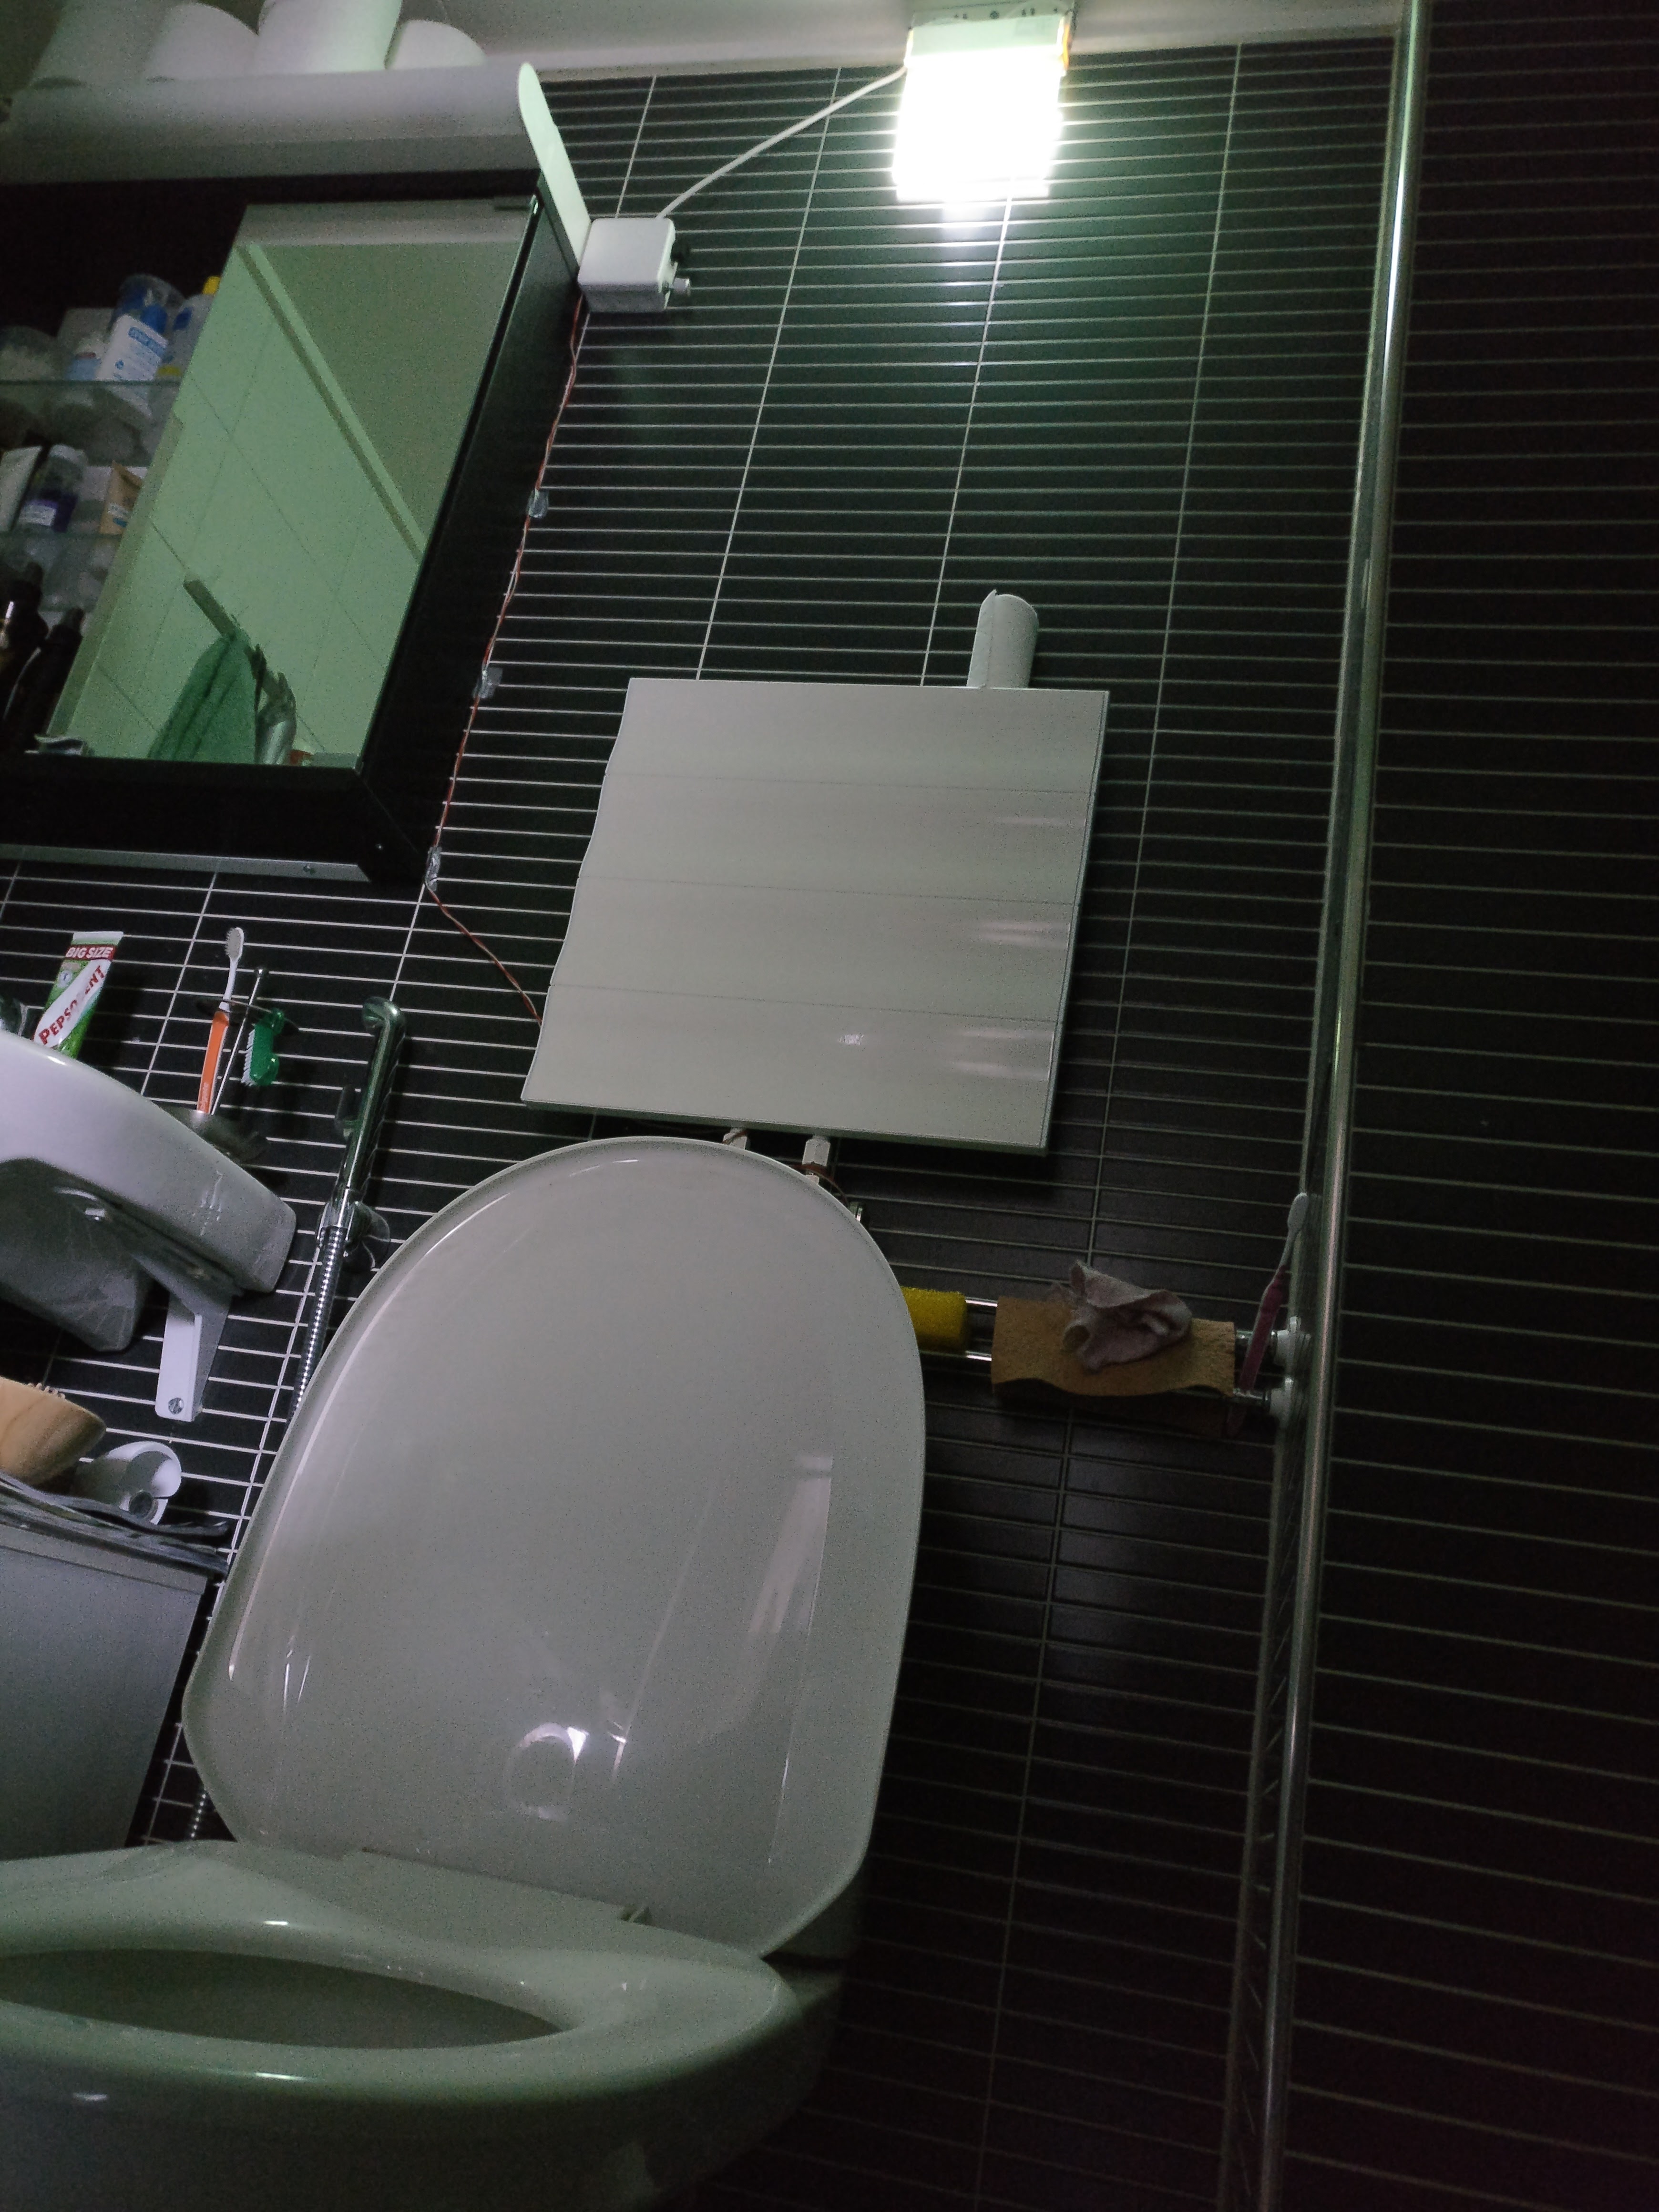
Second attempt was also an attempt to get rid of my temporarity habit. I used drill to make holes to ceiling and to bathroom mirror cabinet and used proper screws to attach the light and the control unit. And I’m so proud of the end result that it may remain there for as long as we live in this apartment!
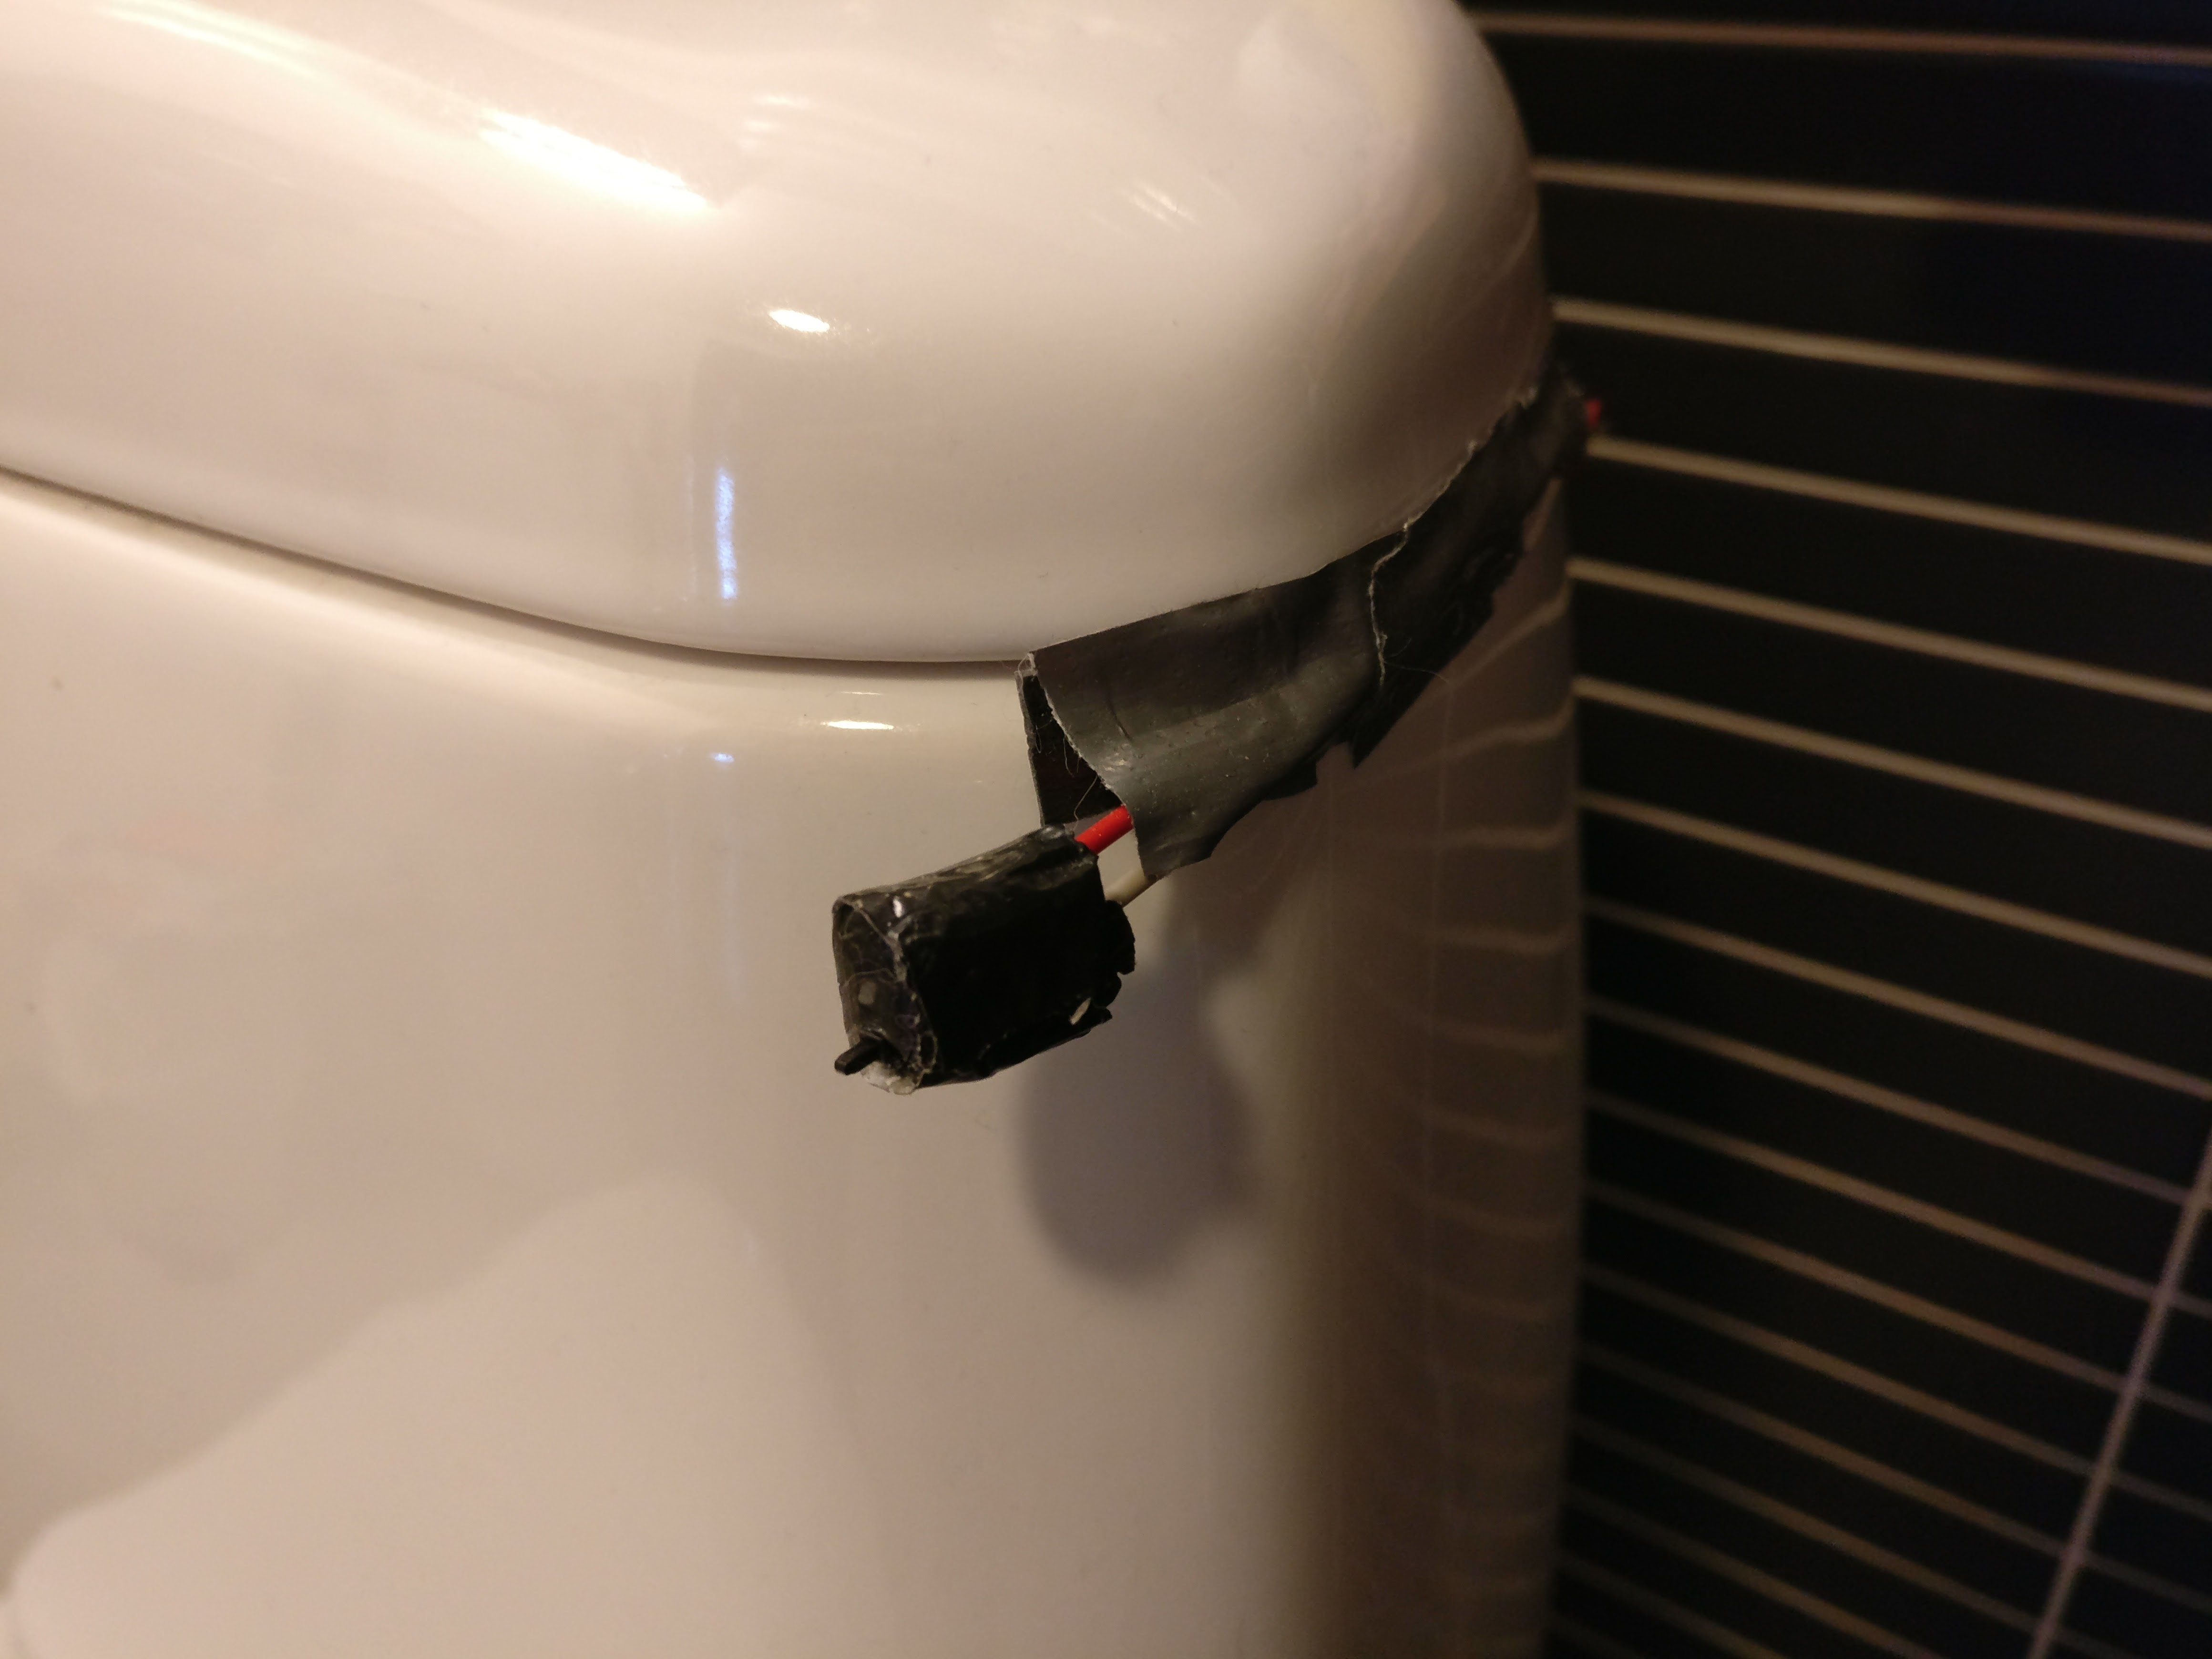
And the final installation is with the sensor wire. The small sensor/switch has a lot of wire so I tied it together a bit and used duck tape and two sided tape to attach it in position on the toilet side so that when the lid is up it presses the switch down gently.
That’s it! We are good to go!
Some tips
Test every connection after soldering and make sure the light works during installation procedure. For some reason after first installation the light did not work and I had to disassemble the whole gadget to find the problem. Which wasn’t there, and after taking the light apart it started working again. So maybe it was with wires bending out from connectors or something, I don’t know. So anyways, test enough and whenever possible.